

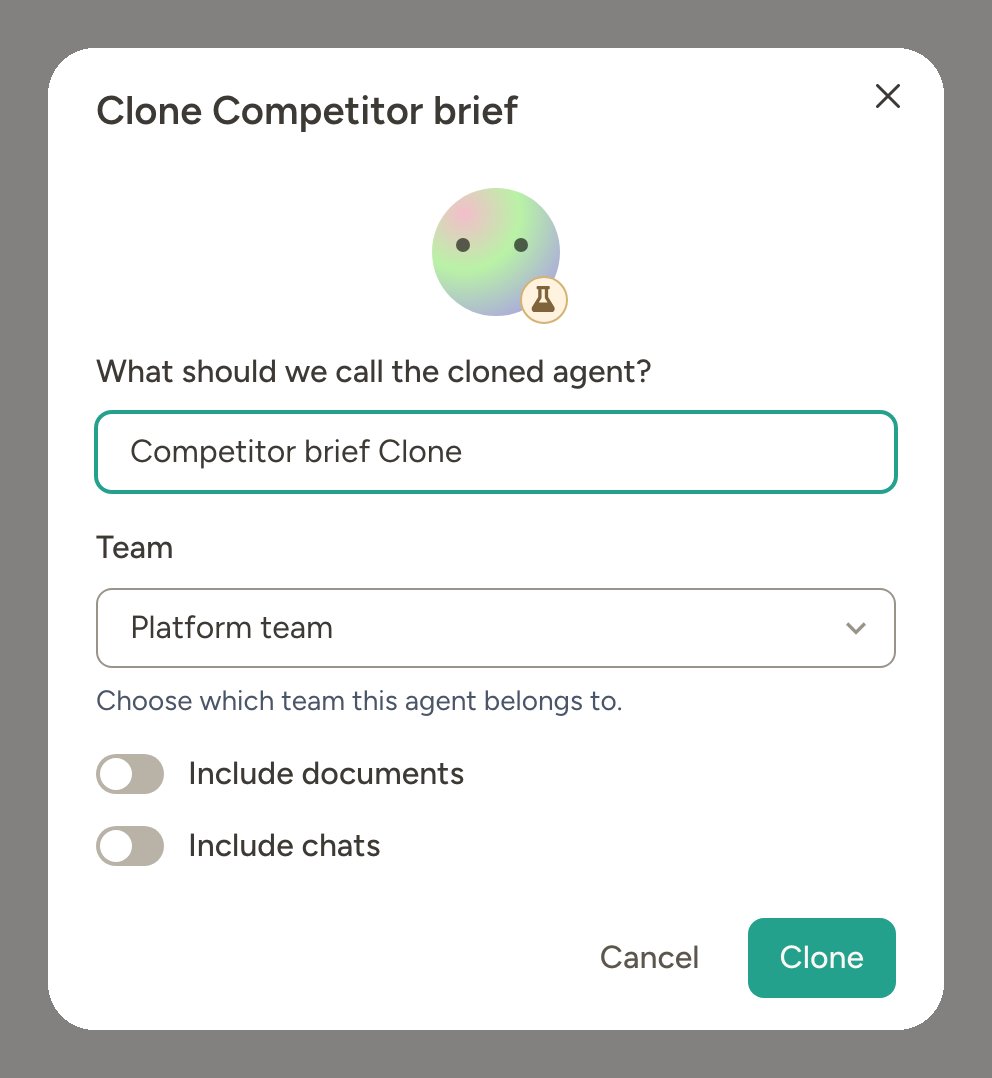
Internal cloning
Internal cloning lets you duplicate an agent within your own workspace or to another workspace you’re a member of. This is useful when you want to:- Create a variation of an existing agent with different instructions
- Set up a similar agent for a different team or project
- Make a “template” agent that you can clone and customize for different use cases
Exporting and importing agent files
You can also move agents using JSON files. This is useful for backups, moving an agent between environments, or sharing a starting point outside direct clone flows.Export an agent to JSON
You can export from two places:- Agent settings → Clone / Export → Export Agent to File
- The three-dot menu on any agent card, then Export
agent_<name>.json. Tool credentials, connected accounts, Outbound APIs, and other environment-specific secrets are never included in the file.
Import a JSON file as a new agent
- Go to + New Agent in your workspace.
- Click Import from file and select the exported JSON file.
- Review the suggested agent name and update it if needed.
- Choose the target team (or the global space, if your permissions allow it).
- Click Import.
What gets cloned
Tool credentials are never copied — you’ll need to reconnect any integrations that require authentication (email,
Slack, Google Drive, etc.) after cloning or importing. MCP servers are carried over but marked as pending
authentication until you re-authorize them.
An Outbound API is defined once for the whole workspace, in Workspace → Outbound APIs, together with the Secrets it authenticates with. Individual agents are then allowed to use it. What a clone inherits is that permission — which of the workspace’s Outbound APIs this agent may call — not the API definition itself.That permission only means something inside the workspace it came from. So a clone that stays in the same workspace keeps it, while a clone into another workspace and any agent created from an exported file start with none — someone has to allow them again from the new agent’s settings.
Including documents, chats, evals, and API access
The clone modal offers optional switches to include:- Documents — agent documents, databases, and apps. If the agent’s databases contain records, a nested Include database records option shows the total count. It’s on by default; turn it off to copy each database’s name, schema and settings without its records. The same option is in the Export dialog.
- Chats — the agent’s conversation history, including any files uploaded into those chats
- Evals — saved evaluations (shown only if the source agent has any)
- API access settings — the APIs the agent exposes to the outside: webhooks, its own HTTP API endpoints, exposed documents, and MCP server exposure (shown only if the source agent exposes APIs). This is not the same as Outbound APIs, which are the APIs the agent calls — those follow the rule in the note above.
Access on cloned agents
The person who performs the clone automatically becomes an Owner of the new agent. The new agent starts with default access settings for the target workspace and team, regardless of the source agent’s settings — so clones don’t carry over per-user permissions from the original.Public sharing
Public sharing lets you publish your agent so anyone with a link can clone it to their own workspace. This is perfect for sharing agent templates, showcasing your work, or letting others benefit from an agent you’ve built.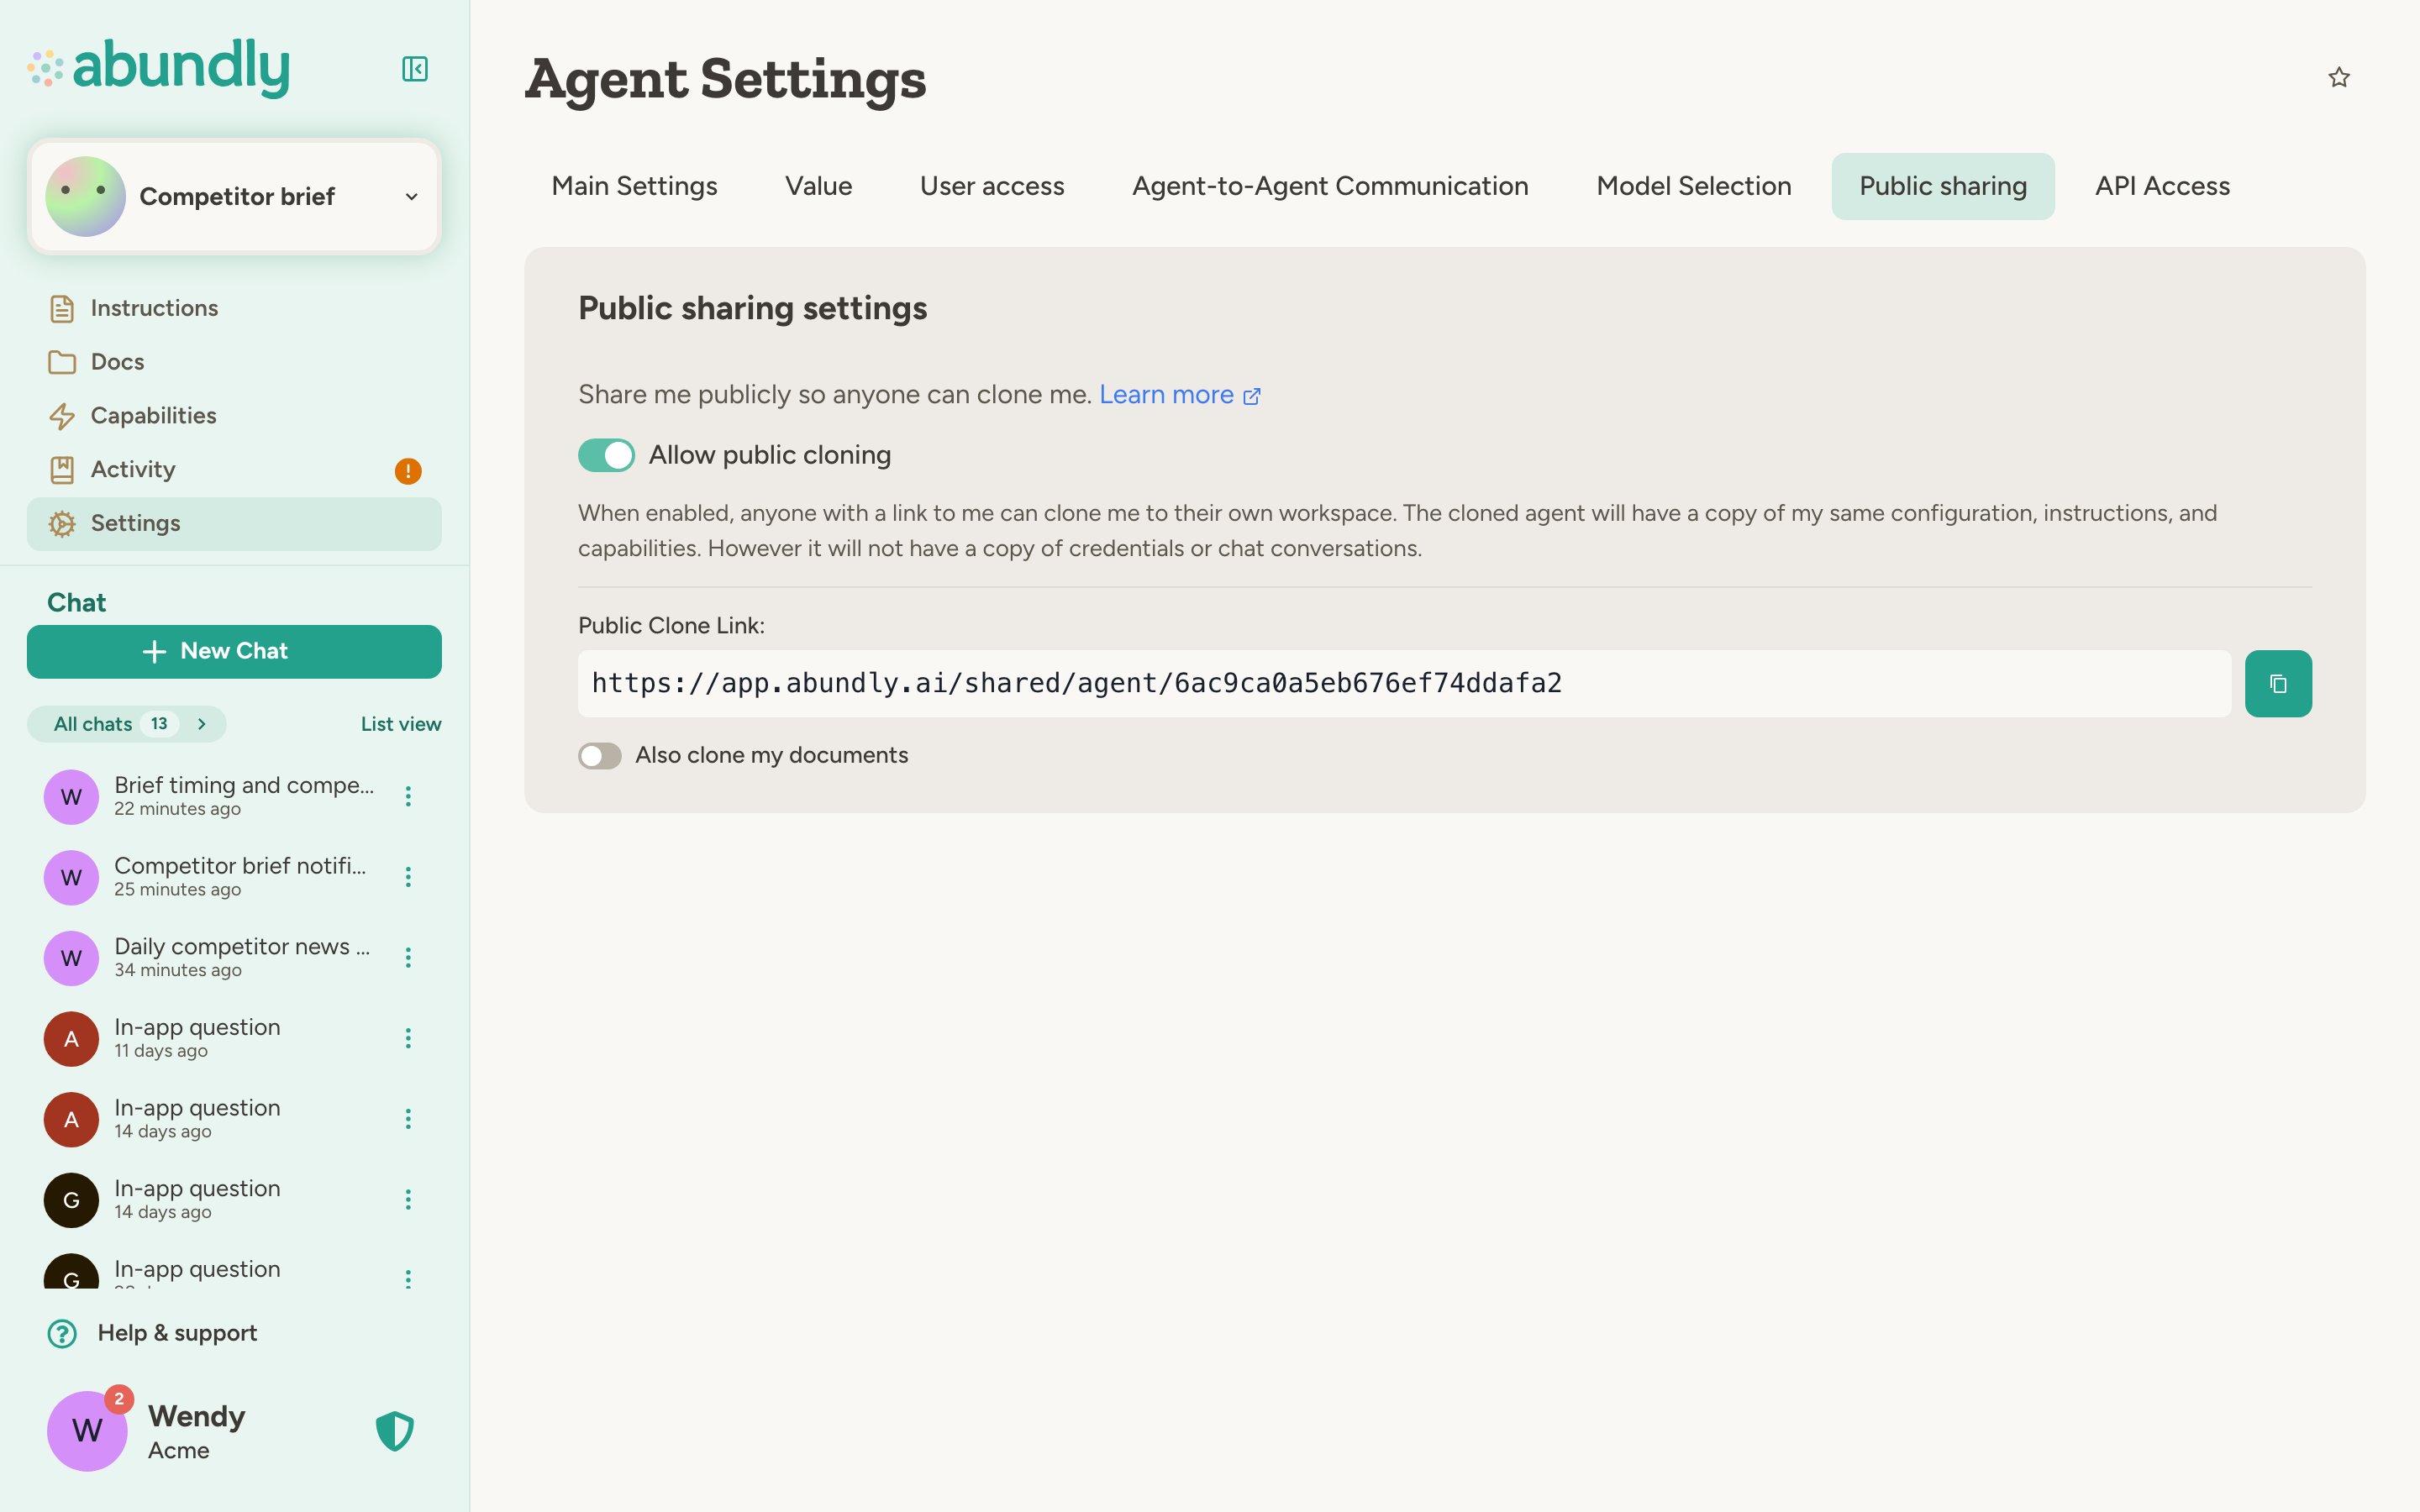
Turning on public sharing for a workspace
Public sharing is off by default. A workspace admin turns it on under Workspace → Settings → Public agent sharing. Until then, agents have no Public sharing tab. When a workspace admin turns it off again:- The Public sharing tab disappears from every agent, and no agent can be shared publicly.
- Agents that were already shared keep their setting, but their public links stop working. Turning public sharing back on restores them.
Workspaces that had a publicly shared agent before this setting existed have it turned on, so their links keep
working.
Enabling public sharing for an agent
- Go to the agent’s Settings → Public sharing tab
- Toggle Allow public cloning on
- Copy the Public Clone Link to share with others
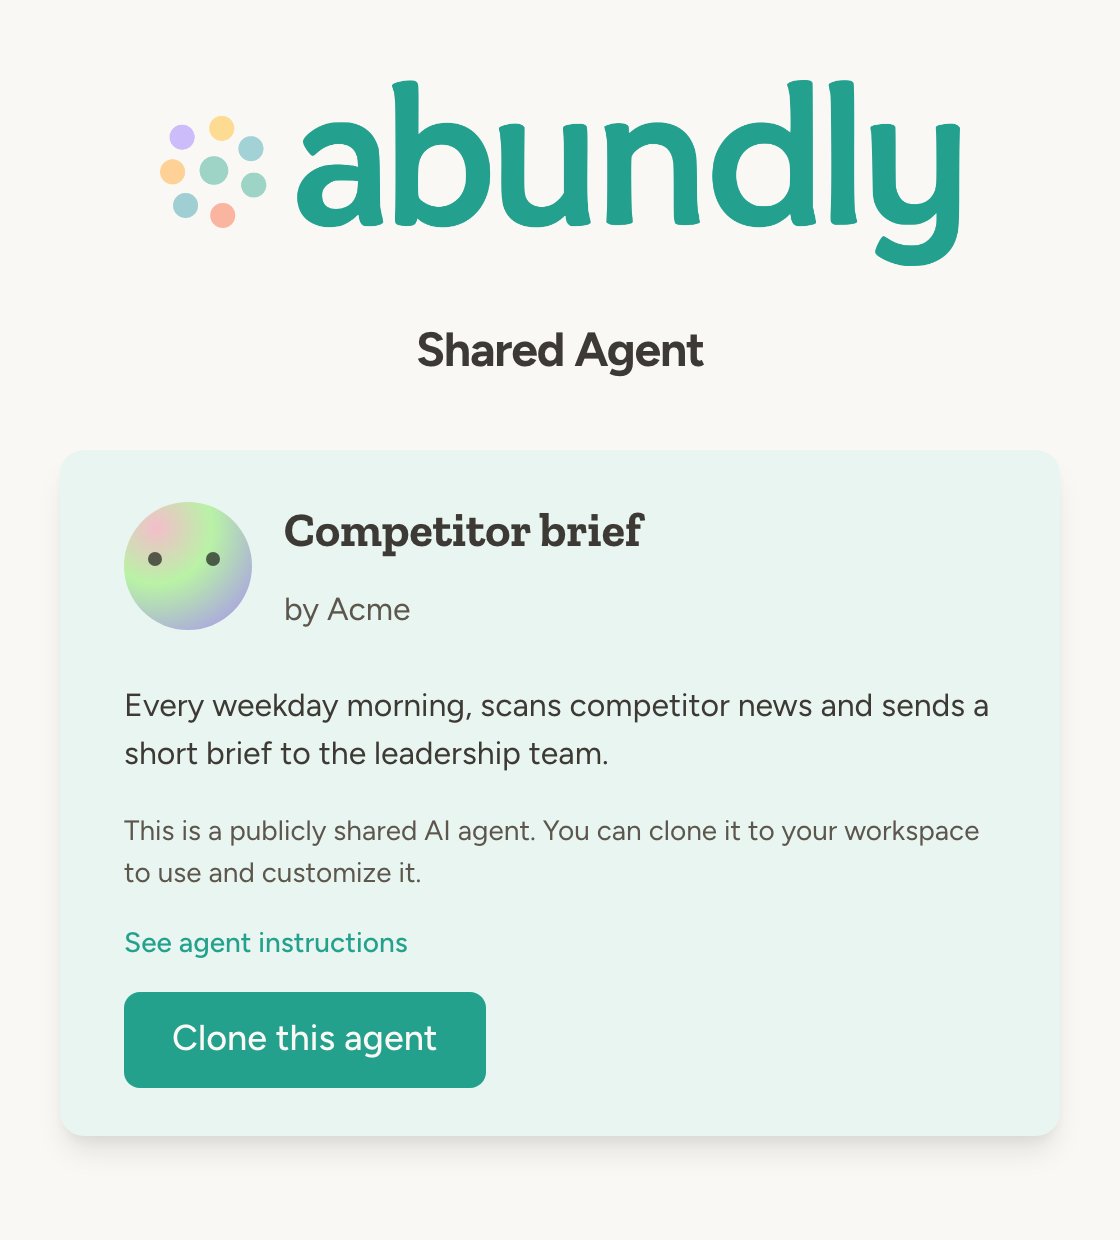
What’s publicly visible
When you enable public sharing, visitors can see:- Agent name and description
- Your name (as the creator)
- The agent’s instructions (they can click “See agent instructions” to view them)
Including documents in public shares
You can optionally allow people who clone your public agent to also receive copies of its documents. Enable Also clone my documents in the public sharing settings to include documents in the clone.Cloning someone else’s public agent
When you find a public agent you want to clone:- Click the shared link to view the agent
- Click Clone this agent
- If you’re not logged in, you’ll be prompted to sign in or create an account
- Choose a name for your clone and select which workspace to add it to
- Click Clone to create your copy
Example use cases
- Template library: Create a collection of “starter agents” that workspace members can clone and customize for their specific needs
- Cross-team deployment: Build an agent once, then clone it to multiple teams in your workspace
- Community sharing: Share useful agents with the broader Abundly community via public links
- Backup and versioning: Clone an agent before making major changes, keeping the original as a backup
FAQ
Can I see who has cloned my public agent?
Can I see who has cloned my public agent?
Not currently. The system tracks clone relationships internally, but there’s no UI to browse this data.
Is the cloned agent linked to the original?
Is the cloned agent linked to the original?
Cloned agents track their source internally, but they are completely independent. Changes to one don’t affect the
other, and if the original is deleted, the clone continues to work normally.
What access do I need to enable public sharing?
What access do I need to enable public sharing?
You need to be an Owner of the agent to change public sharing settings.
What access do I need to clone an agent?
What access do I need to clone an agent?
You need Use access on the source agent to clone it.
Does cloning respect team settings?
Does cloning respect team settings?
Yes. If your workspace uses teams, you can choose which team to place the cloned agent in. If you don’t have
permission to create global agents, you must select a team.
If I update my public agent, do clones get updated too?
If I update my public agent, do clones get updated too?
No. Clones are completely independent from the moment they’re created. Updates to the original don’t propagate to existing clones.
Learn more
Agent Management
Organize and manage agents across your workspace
Teams
Organize agents and workspace members into teams
Access Control
Configure who can access your agents